Cherry on Top Quilt Card
Once again I am combining some old with the new. The Top Note Quilt card has been around for years but with the upcoming Top Note Die retirement I felt it needed one last time in the spotlight!What's fun about this style card is that it looks like a patchwork quilt. Just by changing the designer series paper you can get a different look.

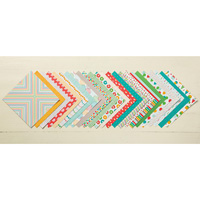
It is always good to match the inside of the card and stamp the envelope to coordinate for the recipient. The new Cherry on Top 6x6 paper pack has loads of fun patterns to choose from.

Steps to Create Quilt Card:
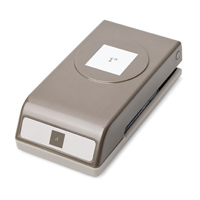
- Punch (20) 1 inch Squares with Punch #124094
- Lay out your squares on your work table in the pattern you desire.
- Use a Glue stick to entirely cover a 4 1/8 x 5 1/2 inch piece of cardstock.
- Working quickly transfer the squares to your sticky cardstock making sure to butt the squares firmly together, leaving no gaps. I find glue stick allows for full coverage of you design.
- Cut the top note die out of the design piece.
- Using the thicker project life black pen, draw x's on the seams of the cardstock (see Below) for a cross stitched look.
- Glue this piece to a 5 1/4 x 4 inch of Bermuda Bay Cardstock.
- Run the entire piece through an embossing folder. I used the Argyle Embossing Folder # 127750.
- Stamp your Greetings and punch out with punches. Pop up with a dimensional.
- Mount on a Crushed Curry card stock base.
- Adhere 1/4 x 5 1/4 inch matching DSP strip to a 5 1/4 x 4 inch Whisper White Inside Panel. Mount inside.
- Stamp a Greeting on the envelope.
Closer look at Quilted and Stitched Top Note Die:

If you would like to order any of these items retiring items before June 3rd click the links below to shop on my website. Thanks for looking!


No comments:
Post a Comment